


In the last post, we cloned the project repository and briefly talked about the project's essential dependencies.
This post is part 2 of (User authentication with Node.js series), find part 1 here.
In this part, we will cover the following points:
MongoDB setup
What is MongoDB ?
MongoDB is an open-source cross-platform database and is currently the most popular NoSQL architecture.
MongoDB uses JSON-documents and schemas to store data.
If you want to learn more about MongoDB, here is a crash course tutorial from Travesty Media on Youtube.
Open MongoDB account
1- Head over to mongodb cloud and create an account.
2- Next, in the main dashboard click New Project from the top right.
3- Give your project a name and click Next, now your dashboard should look like this:
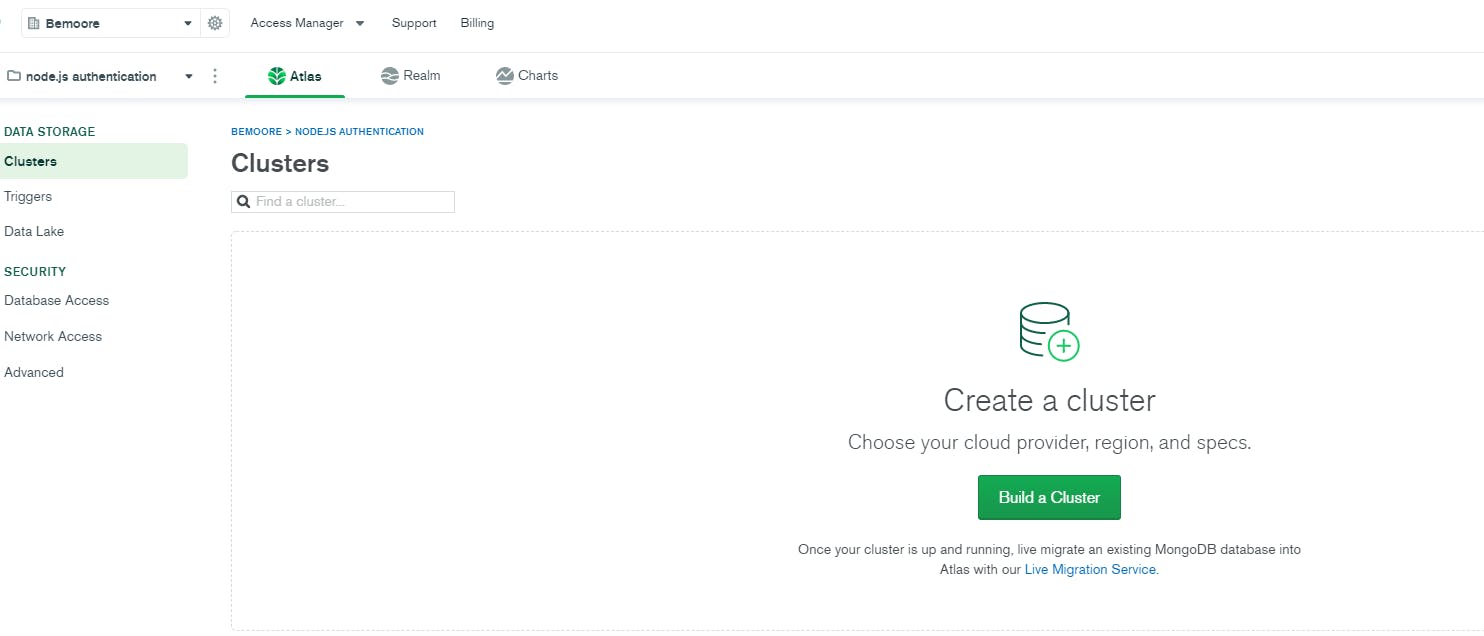 4- Click
 Build a Cluster.
From the list below, select a cloud provider and region, you can optionally give your cluster another name from Cluster Name tab.
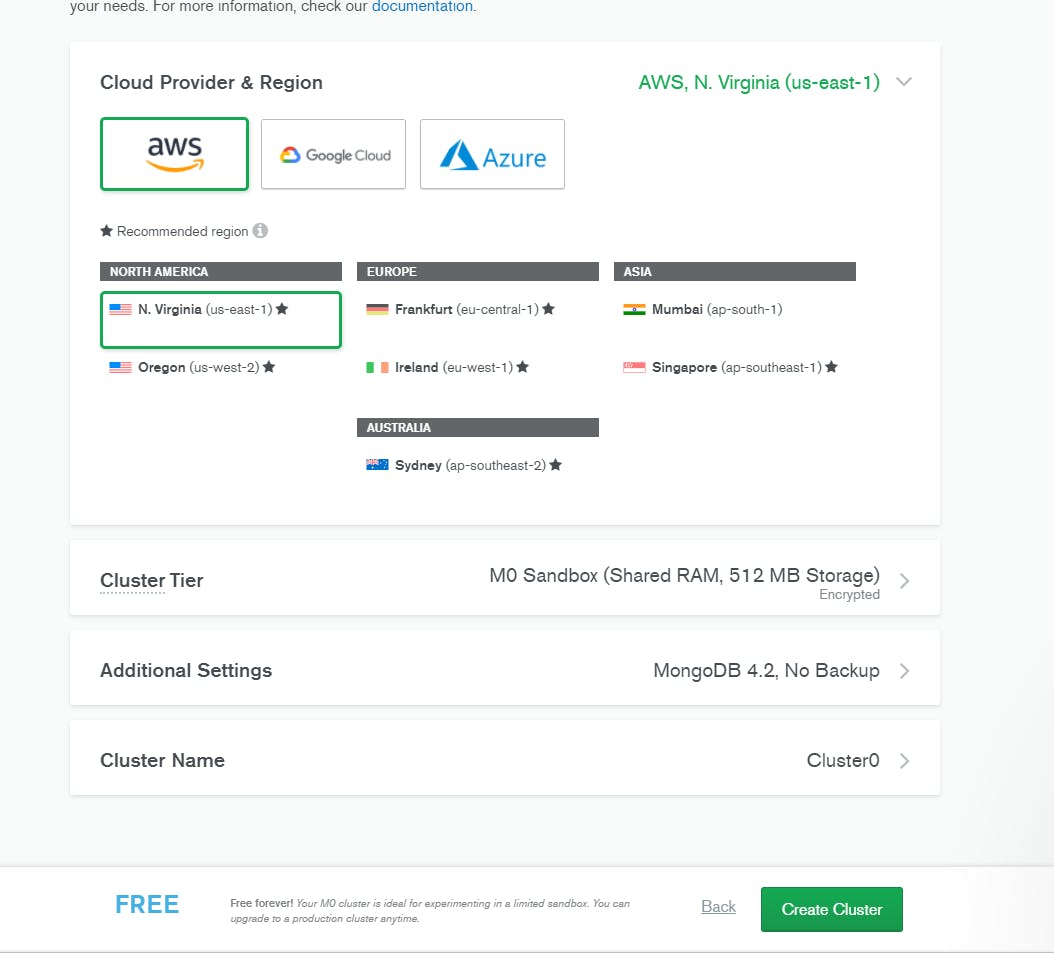
5- MongoDB will offer you the choice between Shared Cluster and Dedicated Cluster, for this test project make sure to select a FREE option and Click Create a Cluster.
6- It can take up to 10 min (depending on where you are) for the cluster to complete, now it's time to grab a cup of tea! :)
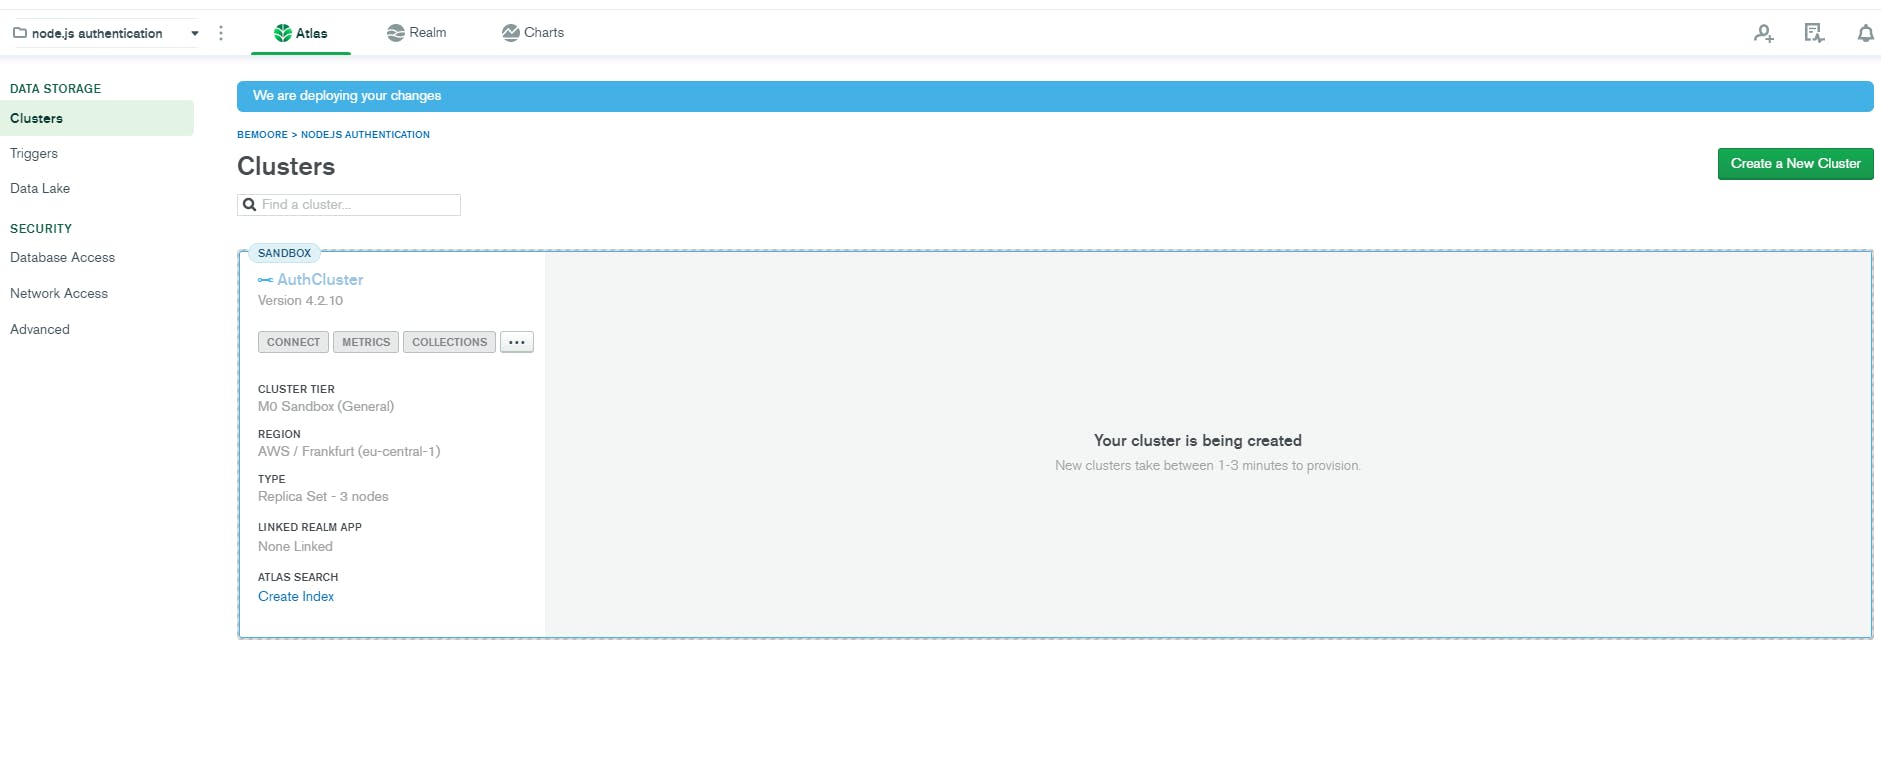
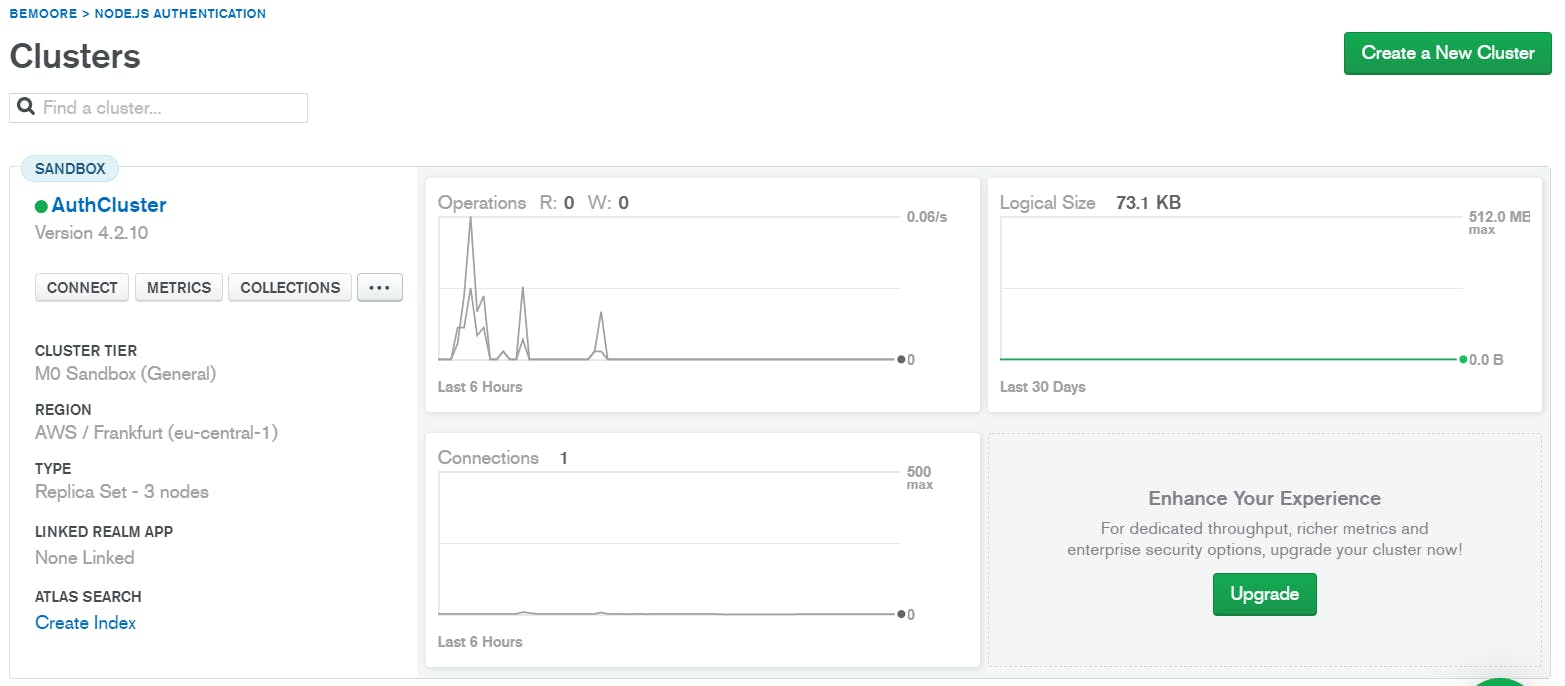
7- When the cluster is ready, click the connect button on the left pane.
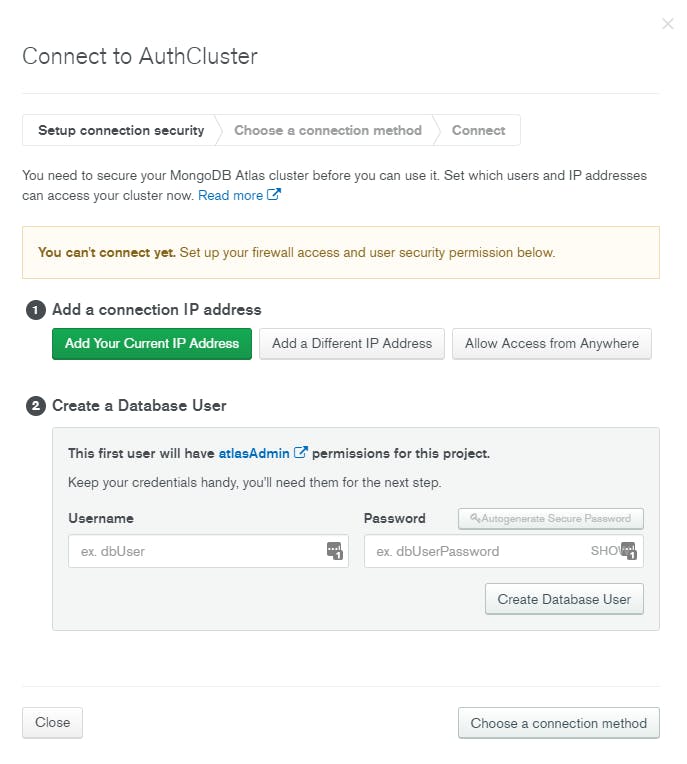
8- Next we need to whitelist our IP address, click Add Your Current IP Address.
9- Enter a database Username and Password and click Create Database User
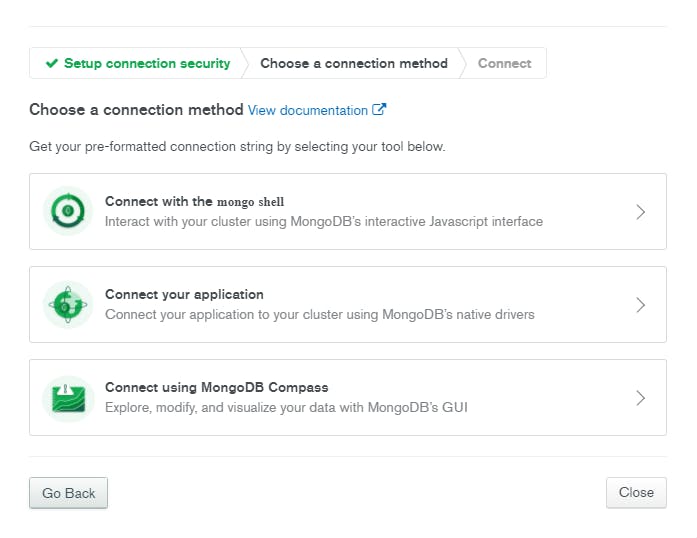
10- Next, click Choose a connection method
11- Next, click Connect your application
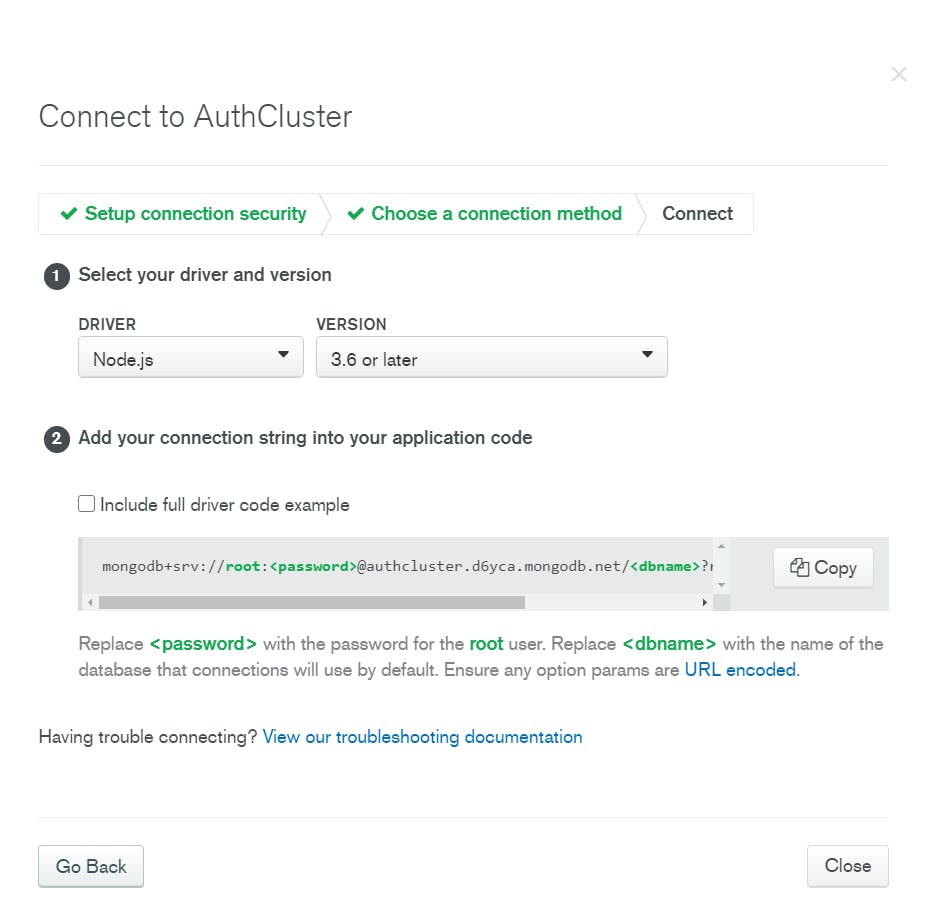
12- Copy your connection string
Connect to MongoDB with mongoose.
MongoDB cloud account and the cluster are all set, we only need to find a way to connect the server application to our database.
In this application, we will make use of mongoose, an excellent MongoDB client.
I highly recommend going through mongoose docs, they offer extensive query guides and API resources. Find them here
1- Open the project with your favorite text editor
You can find the starter project repository here :
git clone https://github.com/2imad/node-js-authentication/tree/boilerplate
cd node-js-authentication
npm install
2- in db folder, find and open mongoose.js file
In this file we will :
- Require in the mongoose module
- Construct the connection URI and hide our credentials with dotenv
- Attempt to connect to MongoDB with the URI
- Handle connection errors
First, we need to create a .env file at the project root level to store our environment variables.
Open the .env file and set the following environment variables corresponding to your cluster's connection string, it should be like this :
mongodb+srv://<username>:<password>@<hostname>/<dbname>?retryWrites=true&w=majority
DB_USER_NAME=username
DB_USER_PASSWORD=password
DB_HOST=hostname
DB_NAME=dbname   // you can choose any name you like. ex. "users"
The environment variables will be automatically stored in process.env object once we start our server.
A server restart is required each time the content of
.envfile is changed.
Alright, save the file and make sure to include it in .gitignore . The content of this file should never be committed to the remote code base, we will insert these environment variables directly in Heroku when we deploy to production.
Now we are ready to write some code, in mongoose.js write the following :
// require mongoose module
const mongoose = require("mongoose");
// require dotenv module
require("dotenv").config();

// construct connection URI with environment variables stored in .env
const URI = `mongodb+srv://${process.env.DB_USER_NAME}:${process.env.DB_USER_PASSWORD}@${process.env.DB_HOST}/${process.env.DB_NAME}?retryWrites=true&w=majority`;

// Attempt to connect to MongoDB using mongoose client
mongoose.connect(URI, {    // pass the URI as first argument
  useNewUrlParser: true,      // pass an options object with default mognodb parameters
  useUnifiedTopology: true,
  useCreateIndex: true,
});

// listen to "connected event" and log "Connected to MongoDb"
mongoose.connection.on("connected", () => {
  console.log("Connected to MongoDb");
});

// listen to "error event" and log "Error connecting to MongoDb" + error message
mongoose.connection.on("error", (e) => {
  console.error("Error connecting to MongoDb", e.message);
});
At the top of the index.js file, add the following:
require("./db/mongoose");  // require mongoose.js file
const express = require("express");
const app = express();
const PORT = process.env.PORT || 8000;
app.listen(PORT, () => console.log(`Listening on ${PORT}`));
Finally, run the following command to test the connection:
npm run server
Output :
[0] Listening on 8000
[0] Connected to MongoDb
Troubleshooting
It is very common for Mongodb to throw an error the first time you run it. Here are some tips to solve any problems you might face.
1- Read carefully the error message, most of the time, the MongoDB team adds the solution right after the error.
2- Copy the entire error message and paste it into google, the chance that somebody else had the same problem as you is very high.
3- Some companies, schools, public networks, institutions, block the type of connection we are making to MongoDB, if you are using a VPN or proxy, you might face some issues.
4- If the problem persists, try connecting from another location.
5- Contact me on Twitter, I will do my best to help you out.
Conclusion
In this section, we set up an account on the MongoDB cloud platform, learned how to hide sensitive credentials using .env file and dotenv module.
Finally, we created mongoose.js file and successfully connected our app to the database.
In the next module, we will create the User schema with mongoose and learn how safely store users credentials with JSON web token and bcrypt
Thank you very much for reading!
Cheers
IYO
Bemoore