# User authentication with Node.js (reading series part 2): MongoDB setup
In the last post, we cloned the project repository and briefly talked about the project's essential dependencies.
> #### This post is part 2 of (*User authentication with Node.js series*), find part 1 [here](https://bemoore.hashnode.dev/user-authentication-nodejs-mongodb-series-part-1).
In this part, we will cover the following points:
- [What is MongoDB + tutorial](#what-is-mongodb).
- [Open MongoDB cloud account](#open-mongodb-account).
- [Connect to MongoDB with mongoose](#connect-to-mongodb-with-mongoose)
---
# MongoDB setup
- #### What is MongoDB ?
MongoDB is an open-source cross-platform database and is currently the most popular NoSQL architecture.
MongoDB uses JSON-documents and schemas to store data.
> If you want to learn more about MongoDB, here is a crash course [tutorial from Travesty Media on Youtube](https://www.youtube.com/watch?v=S3D5suhZ4bs).
- #### Open MongoDB account
|
|
** 1- Head over to [mongodb cloud](https://cloud.mongodb.com/) and create an account. **
** 2- Next, in the main dashboard click `New Project` from the top right. **
** 3- Give your project a name and click `Next`, now your dashboard should look like this: **
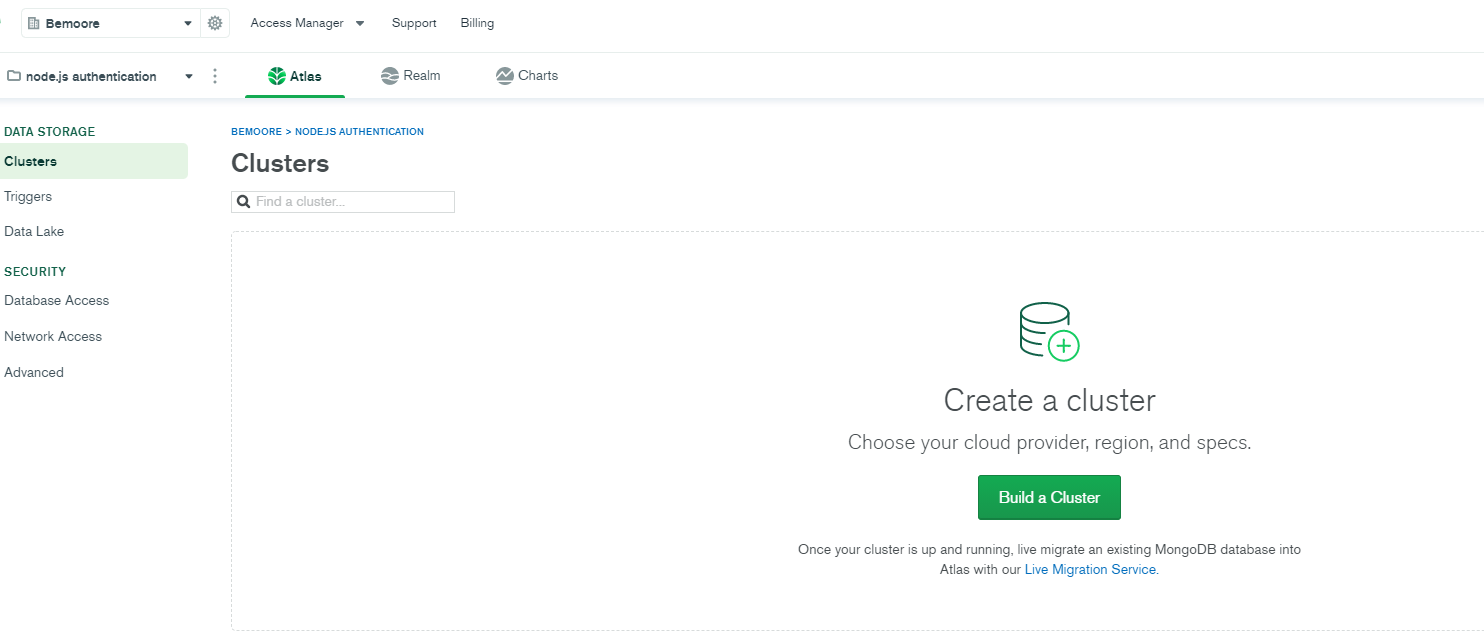 ** 4- Click `Build a Cluster`. **
From the list below, select a cloud provider and region, you can optionally give your cluster another name from `Cluster Name tab`.
** 4- Click `Build a Cluster`. **
From the list below, select a cloud provider and region, you can optionally give your cluster another name from `Cluster Name tab`.
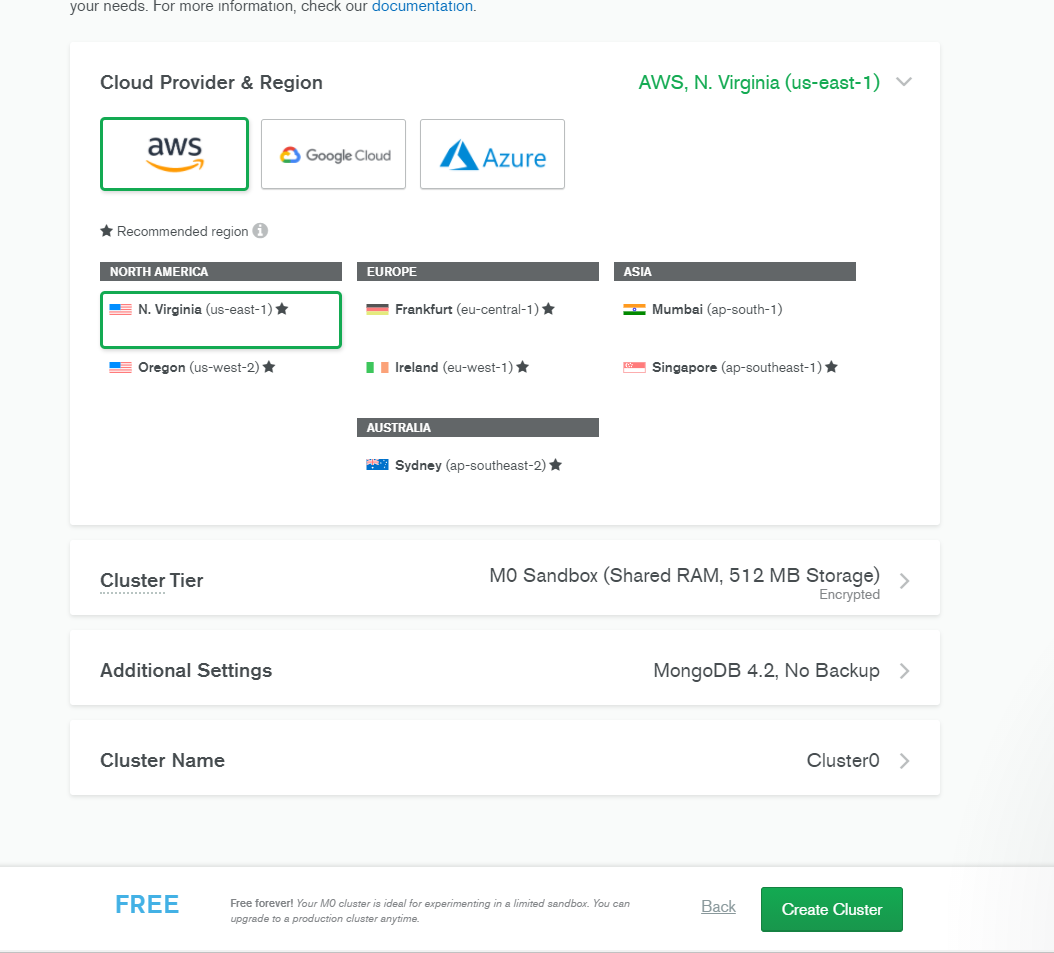 ** 5- MongoDB will offer you the choice between `Shared Cluster` and `Dedicated Cluster`, ** for this test project make sure to select a ***FREE*** option and Click `Create a Cluster`.
** 6- It can take up to 10 min (depending on where you are) for the cluster to complete, now it's time to grab a cup of tea! :) **
** 5- MongoDB will offer you the choice between `Shared Cluster` and `Dedicated Cluster`, ** for this test project make sure to select a ***FREE*** option and Click `Create a Cluster`.
** 6- It can take up to 10 min (depending on where you are) for the cluster to complete, now it's time to grab a cup of tea! :) **
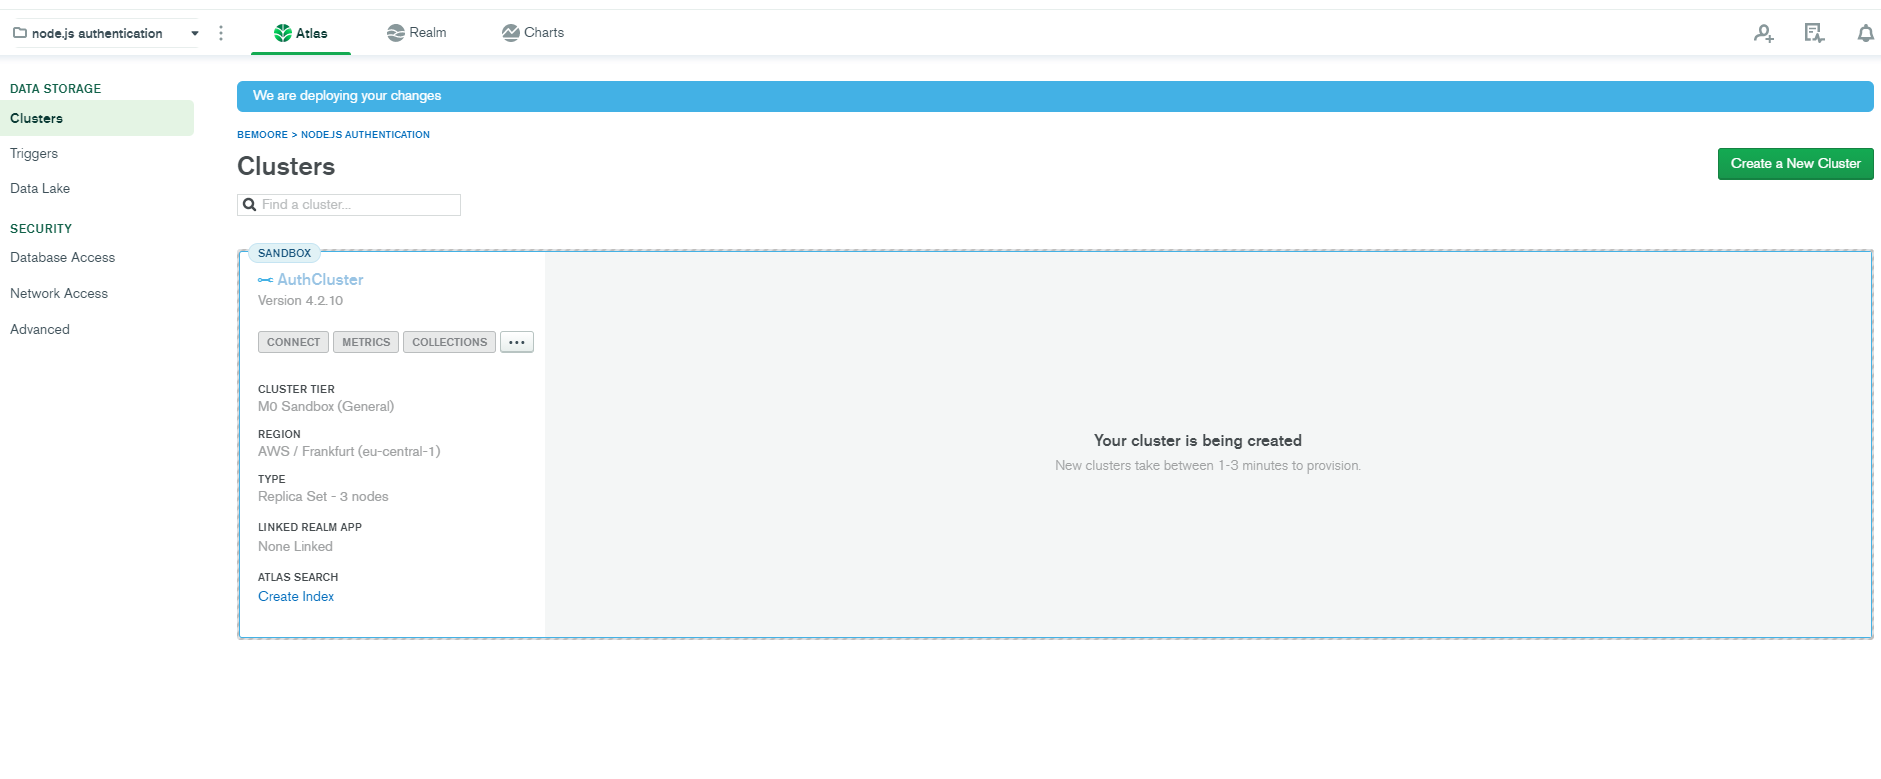
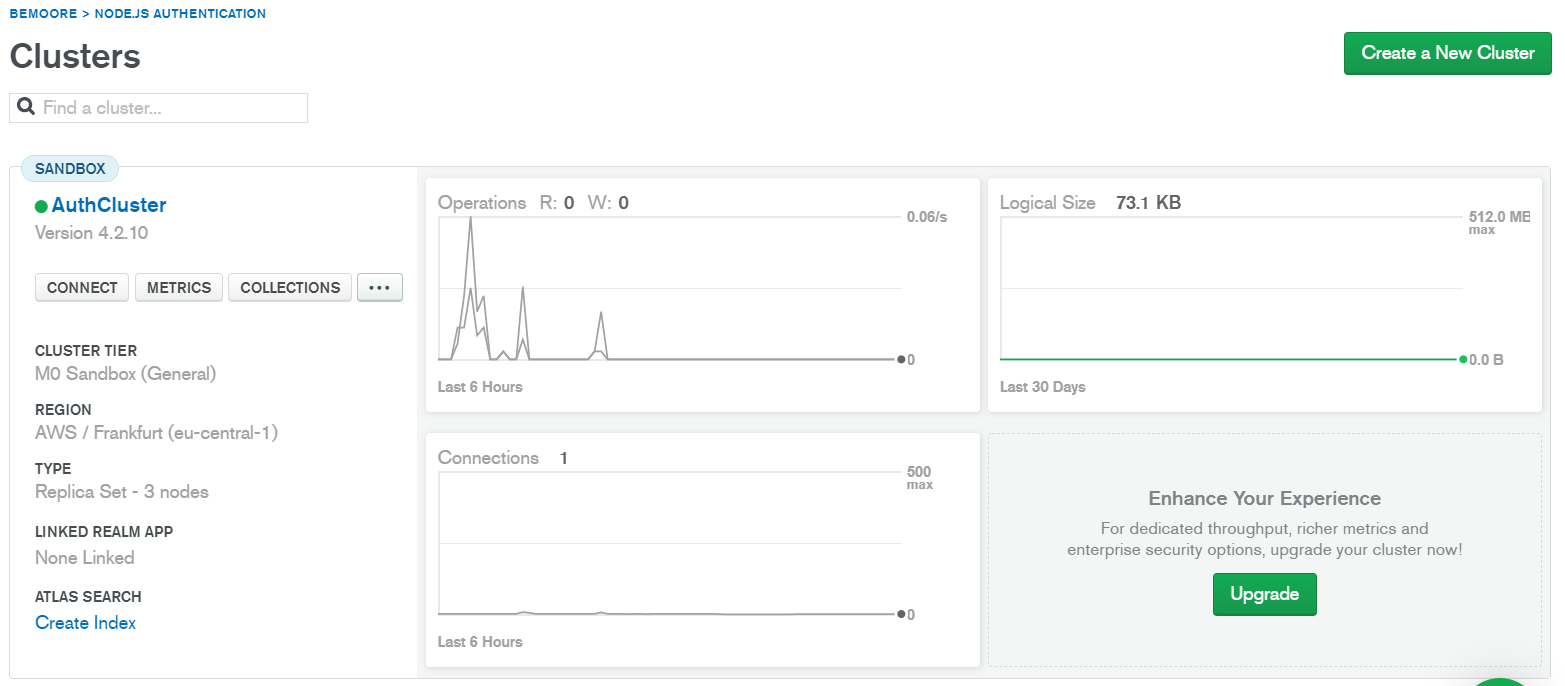
** 7- When the cluster is ready, click the `connect` button on the left pane. **
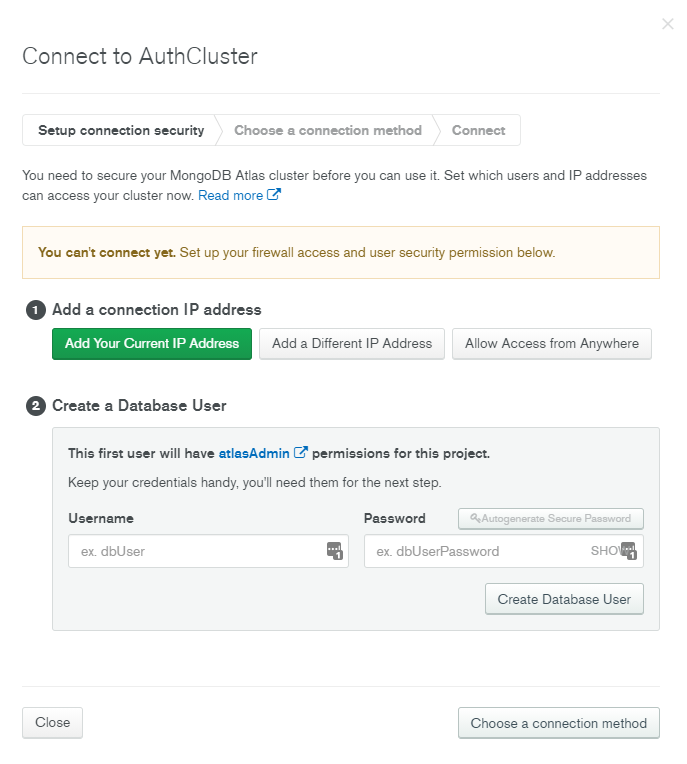
** 8- Next we need to whitelist our IP address, click `Add Your Current IP Address`. **
** 9- Enter a database `Username` and `Password` and click `Create Database User` **
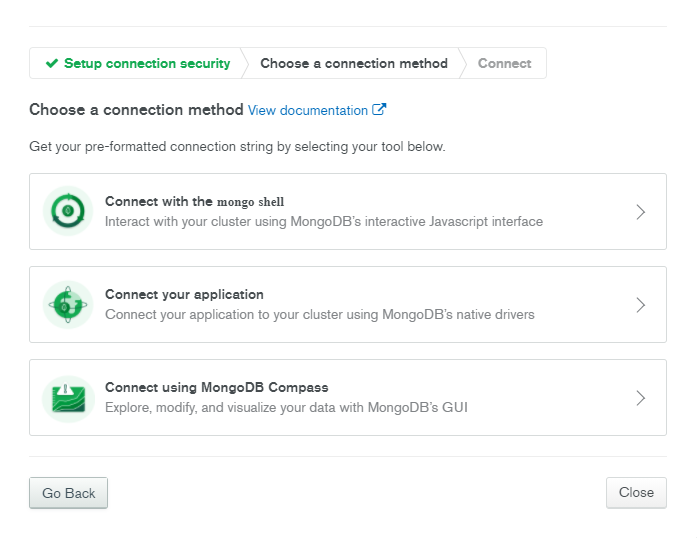
** 10- Next, click `Choose a connection method` **
 ** 11- Next, click `Connect your application` **
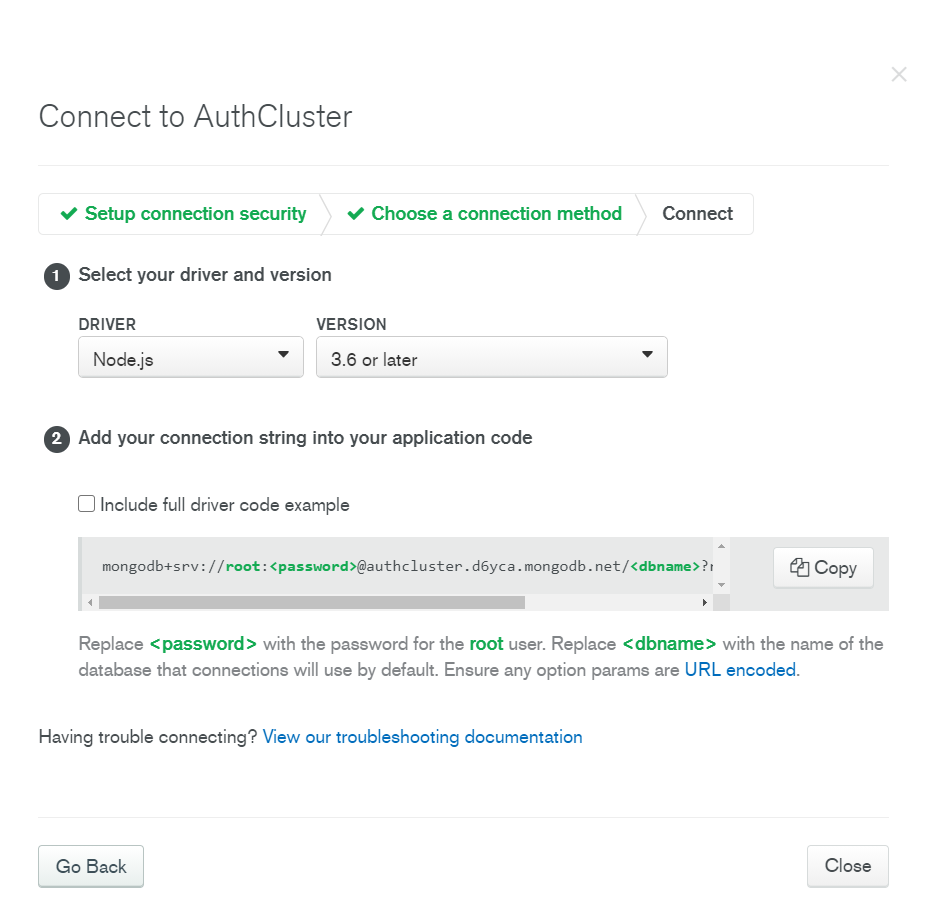
** 12- `Copy` your connection string **
** 11- Next, click `Connect your application` **

** 12- `Copy` your connection string **
 - #### Connect to MongoDB with mongoose.
MongoDB cloud account and the cluster are all set, we only need to find a way to connect the server application to our database.
In this application, we will make use of ***mongoose***, an excellent MongoDB client.
> I highly recommend going through mongoose docs, they offer extensive query guides and API resources. [Find them here](https://mongoosejs.com/docs/guide.html)
** 1- Open the project with your favorite text editor **
You can find the starter project repository here :
```bash
git clone https://github.com/2imad/node-js-authentication/tree/boilerplate
cd node-js-authentication
npm install
```
** 2- in `db` folder, find and open `mongoose.js` file **
In this file we will :
- ** Require in the mongoose module **
- ** Construct the connection URI and hide our credentials with *dotenv* **
- ** Attempt to connect to MongoDB with the URI **
- ** Handle connection errors **
First, we need to create a `.env` file at the project root level to store our environment variables.
Open the `.env` file and set the following environment variables corresponding to your cluster's connection string, it should be like this :
`mongodb+srv://:@/?retryWrites=true&w=majority`
````bash
DB_USER_NAME=username
DB_USER_PASSWORD=password
DB_HOST=hostname
DB_NAME=dbname // you can choose any name you like. ex. "users"
```
The environment variables will be automatically stored in **process.env** object once we start our server.
> *A server restart is required each time the content of `.env` file is changed.*
Alright, *** save the file *** and make sure to include it in ***.gitignore*** .
The content of this file should never be committed to the remote code base, we will insert these environment variables directly in ***Heroku*** when we deploy to production.
Now we are ready to write some code, in `mongoose.js` write the following :
```Javascript
// require mongoose module
const mongoose = require("mongoose");
// require dotenv module
require("dotenv").config();
// construct connection URI with environment variables stored in .env
const URI = `mongodb+srv://${process.env.DB_USER_NAME}:${process.env.DB_USER_PASSWORD}@${process.env.DB_HOST}/${process.env.DB_NAME}?retryWrites=true&w=majority`;
// Attempt to connect to MongoDB using mongoose client
mongoose.connect(URI, { // pass the URI as first argument
useNewUrlParser: true, // pass an options object with default mognodb parameters
useUnifiedTopology: true,
useCreateIndex: true,
});
// listen to "connected event" and log "Connected to MongoDb"
mongoose.connection.on("connected", () => {
console.log("Connected to MongoDb");
});
// listen to "error event" and log "Error connecting to MongoDb" + error message
mongoose.connection.on("error", (e) => {
console.error("Error connecting to MongoDb", e.message);
});
```
At the top of the `index.js` file, add the following:
```Javascript
require("./db/mongoose"); // require mongoose.js file
const express = require("express");
const app = express();
const PORT = process.env.PORT || 8000;
app.listen(PORT, () => console.log(`Listening on ${PORT}`));
```
Finally, run the following command to test the connection:
```bash
npm run server
```
Output :
````bash
[0] Listening on 8000
[0] Connected to MongoDb
```
---
# Troubleshooting
It is very common for Mongodb to throw an error the first time you run it.
Here are some tips to solve any problems you might face.
1- Read carefully the error message, most of the time, the MongoDB team adds the solution right after the error.
2- Copy the entire error message and paste it into google, the chance that somebody else had the same problem as you is very high.
3- Some companies, schools, public networks, institutions, ***block*** the type of connection we are making to ***MongoDB***, if you are using a VPN or proxy, you might face some issues.
4- If the problem persists, try connecting from another location.
5- Contact me on [Twitter](https://twitter.com/iyo_bemoore), I will do my best to help you out.
---
# Conclusion
In this section, we set up an account on the MongoDB cloud platform, learned how to hide sensitive credentials using `.env` file and `dotenv` module.
Finally, we created `mongoose.js` file and successfully connected our app to the database.
In the next module, we will create the `User` schema with ***mongoose*** and learn how safely store users credentials with ***JSON web token*** and ***bcrypt***
Thank you very much for reading!
Cheers
IYO
***Bemoore***
- #### Connect to MongoDB with mongoose.
MongoDB cloud account and the cluster are all set, we only need to find a way to connect the server application to our database.
In this application, we will make use of ***mongoose***, an excellent MongoDB client.
> I highly recommend going through mongoose docs, they offer extensive query guides and API resources. [Find them here](https://mongoosejs.com/docs/guide.html)
** 1- Open the project with your favorite text editor **
You can find the starter project repository here :
```bash
git clone https://github.com/2imad/node-js-authentication/tree/boilerplate
cd node-js-authentication
npm install
```
** 2- in `db` folder, find and open `mongoose.js` file **
In this file we will :
- ** Require in the mongoose module **
- ** Construct the connection URI and hide our credentials with *dotenv* **
- ** Attempt to connect to MongoDB with the URI **
- ** Handle connection errors **
First, we need to create a `.env` file at the project root level to store our environment variables.
Open the `.env` file and set the following environment variables corresponding to your cluster's connection string, it should be like this :
`mongodb+srv://:@/?retryWrites=true&w=majority`
````bash
DB_USER_NAME=username
DB_USER_PASSWORD=password
DB_HOST=hostname
DB_NAME=dbname // you can choose any name you like. ex. "users"
```
The environment variables will be automatically stored in **process.env** object once we start our server.
> *A server restart is required each time the content of `.env` file is changed.*
Alright, *** save the file *** and make sure to include it in ***.gitignore*** .
The content of this file should never be committed to the remote code base, we will insert these environment variables directly in ***Heroku*** when we deploy to production.
Now we are ready to write some code, in `mongoose.js` write the following :
```Javascript
// require mongoose module
const mongoose = require("mongoose");
// require dotenv module
require("dotenv").config();
// construct connection URI with environment variables stored in .env
const URI = `mongodb+srv://${process.env.DB_USER_NAME}:${process.env.DB_USER_PASSWORD}@${process.env.DB_HOST}/${process.env.DB_NAME}?retryWrites=true&w=majority`;
// Attempt to connect to MongoDB using mongoose client
mongoose.connect(URI, { // pass the URI as first argument
useNewUrlParser: true, // pass an options object with default mognodb parameters
useUnifiedTopology: true,
useCreateIndex: true,
});
// listen to "connected event" and log "Connected to MongoDb"
mongoose.connection.on("connected", () => {
console.log("Connected to MongoDb");
});
// listen to "error event" and log "Error connecting to MongoDb" + error message
mongoose.connection.on("error", (e) => {
console.error("Error connecting to MongoDb", e.message);
});
```
At the top of the `index.js` file, add the following:
```Javascript
require("./db/mongoose"); // require mongoose.js file
const express = require("express");
const app = express();
const PORT = process.env.PORT || 8000;
app.listen(PORT, () => console.log(`Listening on ${PORT}`));
```
Finally, run the following command to test the connection:
```bash
npm run server
```
Output :
````bash
[0] Listening on 8000
[0] Connected to MongoDb
```
---
# Troubleshooting
It is very common for Mongodb to throw an error the first time you run it.
Here are some tips to solve any problems you might face.
1- Read carefully the error message, most of the time, the MongoDB team adds the solution right after the error.
2- Copy the entire error message and paste it into google, the chance that somebody else had the same problem as you is very high.
3- Some companies, schools, public networks, institutions, ***block*** the type of connection we are making to ***MongoDB***, if you are using a VPN or proxy, you might face some issues.
4- If the problem persists, try connecting from another location.
5- Contact me on [Twitter](https://twitter.com/iyo_bemoore), I will do my best to help you out.
---
# Conclusion
In this section, we set up an account on the MongoDB cloud platform, learned how to hide sensitive credentials using `.env` file and `dotenv` module.
Finally, we created `mongoose.js` file and successfully connected our app to the database.
In the next module, we will create the `User` schema with ***mongoose*** and learn how safely store users credentials with ***JSON web token*** and ***bcrypt***
Thank you very much for reading!
Cheers
IYO
***Bemoore***